Toggle navigation

NestLand - Real Estate WordPress Theme

Version 1.0.0
Theme Version: 1.0.0
Created: 06 March 2024
Latest update: 06 March 2024
We appreciate that you bought our theme. This article includes all the useful information and specifics you need to use our theme. We hope working with our theme is enjoyable for you. Please feel free to create a ticket in our support center if you require additional assistance.

“NestLand” sounds like a fantastic choice for single property company websites. Its unique, modern, and professional design caters perfectly to apartments, agents, housing, and all things related to the real estate industry. With its sleek and intuitive layout, NestLand provides an exceptional platform for showcasing properties and connecting with potential clients. Whether you’re a real estate agent, property developer, or in the housing business, NestLand offers the tools and aesthetics to elevate your online presence and attract customers effectively.
Powerful features to create your real estate WordPress website.
Your customers will love its straightforward user experience across all devices.
Powered by WooCommerce, the most flexible eCommerce platform in the world, and Elementor, a powerful page builder

Theme Features:

  • Modern and Clean Design
  • Responsive Mobile-Ready Layout
  • Elementor Compatible
  • 4 Unique Header Layout
  • Sticky Header with Customization Options
  • Simple Installation and One-Click Demo Import
  • Full WooCommerce Compatible
  • Child Theme Generator Included
  • Unlimited Color Scheme
  • Mobile Optimized
  • Translate ready
  • Huge Options
  • Speed and SEO Optimized
  • Retina Ready
  • Contact form 7 Compatible

WordPress Information

To install this theme you must have a working version of WordPress already installed. If you need help installing WordPress, follow the instructions in WordPress Codex. Below are all the useful links for WordPress information.

First Steps with WordPress: https://wordpress.org/support/article/first-steps-with-wordpress-classic/
WordPress Codex: https://codex.wordpress.org/Installing_WordPress
FAQ New to WordPress: https://codex.wordpress.org/FAQ_New_To_WordPress
WordPress Optimization: https://wordpress.org/support/article/optimization/

Requirements

Please ensure that WordPress 4.1 or higher, PHP 5.3 or higher, and MySQL 5.6 or higher are all installed on your computer before using Nestbyte. We tried it on Mac, Windows, and Linux systems. Also, to ensure optimal theme functionality, please review the required server configuration:

Minimum server configuration

PHP version – 5.6 and higher
MySQL version – 5.6 or higher
memory_limit – 128M
max_execution_time – 180
max_input_time – 60
upload_max_filesize – 32M

Recommended server configuration

PHP version – 7.0 and higher
MySQL version – 5.6 or higher
memory_limit – 128M
max_execution_time – 180
max_input_time – 60
upload_max_filesize – 32M

License

When purchasing Nestbyte from ThemeForest, you have two licensing options. The Regular License, and the Extended License. The billing, licensing terms and process is purely handled by Envato (the company who owns ThemeForest), and we have no control over these aspects. To learn more about what each License is for and which one to purchase, please visit this License article: https://themeforest.net/licenses/standard?license=regular

Common Questions

Do I need a second license if I want to use Nestbyteon a second website?

Yes, you do. Each purchase of Nestbyte allows you to utilize the theme on one completed website. If you wish to use it on an additional site, a separate license purchase is required.

Can I initially use Nestbyte on a test site and then transfer it to a live site upon completion?

Certainly! You have the flexibility to install the theme on a test site for development purposes and later transfer it to a live site when you’re ready.

Is it permissible to have both a test site and a live site with just one Regular License purchase?

No, it is not allowed as per Envato’s licensing regulations. If the theme is permanently installed on two different locations, it necessitates the acquisition of two licenses.

Download Theme

Download Nestbyte From ThemeForest.

When it comes to installing the Nestbyte theme, you have two options: FTP installation or WordPress installation. In this article, we will focus on the FTP installation method. However, before you proceed, it is essential to download the required theme files from ThemeForest.

If you are new to downloading themes from ThemeForest, we recommend acquiring the Full Theme Package. This package includes extra files like exported sliders, a child theme, and documentation. On the other hand, if you have already downloaded the Full Theme Package, you can simply use the WordPress Installable File.

Step 1: Log in to your ThemeForest account and go to the Downloads section. Locate your Nestbyte theme purchase.

Step 2: Click the Download button and select one of two options:
a) Download the Installable WordPress file only, which contains the WordPress installable file.
b) Download All Files & Documentation, which provides the complete Nestbyte theme package, including additional files and documentation.

Theme Installation

Once you have downloaded the package from ThemeForest, please extract its contents. Inside, you will find a file named “nestbyte.zip,” which is the primary file required for uploading and installation.

You have two options for installing the theme:

  • Utilize the WordPress theme install feature to upload and install the theme.
  • Alternatively, you can employ the FTP function to upload and install the theme.

Install via WordPress Dashboard

Step 1: Go to Appearance > Themes in your WordPress dashboard.

Step 2: Click the Add New button at the top of the page, and then select the Upload Theme button.

Step 3: Click on Choose File and locate the theme files you recently downloaded. If you downloaded the installable WordPress file, there is no need to unzip it. However, if you downloaded the Full Theme Package, unzip the main Nestbyte.zip file. Inside, you will find another Nestbyte.zip file. Select this file for installation.

Step 4: Click the Install Now button.

Step 5: Once the upload and installation process is complete, click on Activate, or go to Appearance > Themes and activate the Nestbytetheme.

Install via FTP

If you encounter any installation failures while using the WordPress install function, we recommend utilizing FTP as an alternative method.

Step 1: If you have downloaded the Full Theme Package from ThemeForest, extract the package file to obtain the theme file called “Nestbyte.zip.” Unzip the “Nestbyte.zip” file, which will result in a folder named “Nestbyte.”

Step 2: Employ an FTP client such as FileZilla and connect to your hosting server. Upload the extracted “Nestbyte” folder to the wp-content/themes directory on your host.

Step 3: Log in to your WordPress Dashboard, navigate to Appearance > Themes, and click the Activate button for the Nestbytetheme.

Run Wizard

After Installation the Theme Wizard will be start automatically. You Have to Follow the wizard steps carefully.

After Start it will ask to intsall a child theme. Our system will automatically install a child theme for you. You can read details about child theme from here.

After Install and Activate the child theme it will redirect to all required plugin.

After Install all Required plugin it will redirect to import demo content.

After Import demo content you are done to setup all basics requirements.

Nestbyte Options

Nestbyte’s powerful options panel provides a convenient way to modify the main options of the template. You can access this panel from the bottom of the Crete menu from admin sidebar. It is designed to offer a user-friendly interface for making changes to various aspects of your website.

The options panel simplifies the process of customizing your template by providing a centralized location to access and modify these settings. Instead of searching through different areas of the WordPress dashboard, you can conveniently make changes to the main options directly from this panel.

This page is really easy to use, is just like any form inside the wp-admin, you must click/change the option that you prefer and finally click on save changes.
If you are experiencing any kind of problems with the theme options, you can always click Reset section (this will reset the current active tab) or even you can Reset All options (all tabs inside the theme options panel).

Before you Reset all the options it is important to create a backup of your current options:

Go to theme options -> Extras > Backup >Import/Export
Click on Download Data File

Global Style

The Global Style tab is a specific section within the theme’s options panel that allows you to control the global styling settings for your website. It provides a centralized location to manage the overall appearance and design elements that apply to multiple areas of your site.

Within the Global Style tab, you will typically find a range of options related to the following aspects:

Global Color: This includes Global main color, Body background color, Link Color, Whole site button color, Input field color and more.

Page Builder Style: Here, you can define the color scheme for various elements of your website page builder Elementor.

Global Layout: This section enables you to control the spacing and layout options for your website. You can adjust width of whole website from here.

Global Typography: This includes settings for the font styles, sizes, and weights used throughout your website. You can customize the font family for headings, body text, links, and other text elements.

Blog

Blog options typically refer to the customization settings and features available for your blog section or blog posts within your website. These options allow you to tailor the appearance and functionality of your blog to suit your preferences. Here are some common blog options you may find in a theme’s customization panel:

Single Blog Options: This option allows you to choose the overall layout of your single blog page or blog posts. You can choose the layout for your single blog posts, such as full-width, sidebar on the left, sidebar on the right, or no sidebar.

Archive Options: This option allows you to choose the layout for your blog archive page. You may have options for a grid layout, and other items from blog category, tags.

Extras

All Kind of extra options available on that section. Like you will be able to add sidebar from here.
Also can add custom font from here too.

White Label

White labeling customization refers to the ability to customize a product or service with your own branding, logo, and design elements, thereby making it appear as if it is your own product rather than a third-party offering. From that settings you will able to customize WordPress Login logo,Login Style, background color and more.

General Widgets

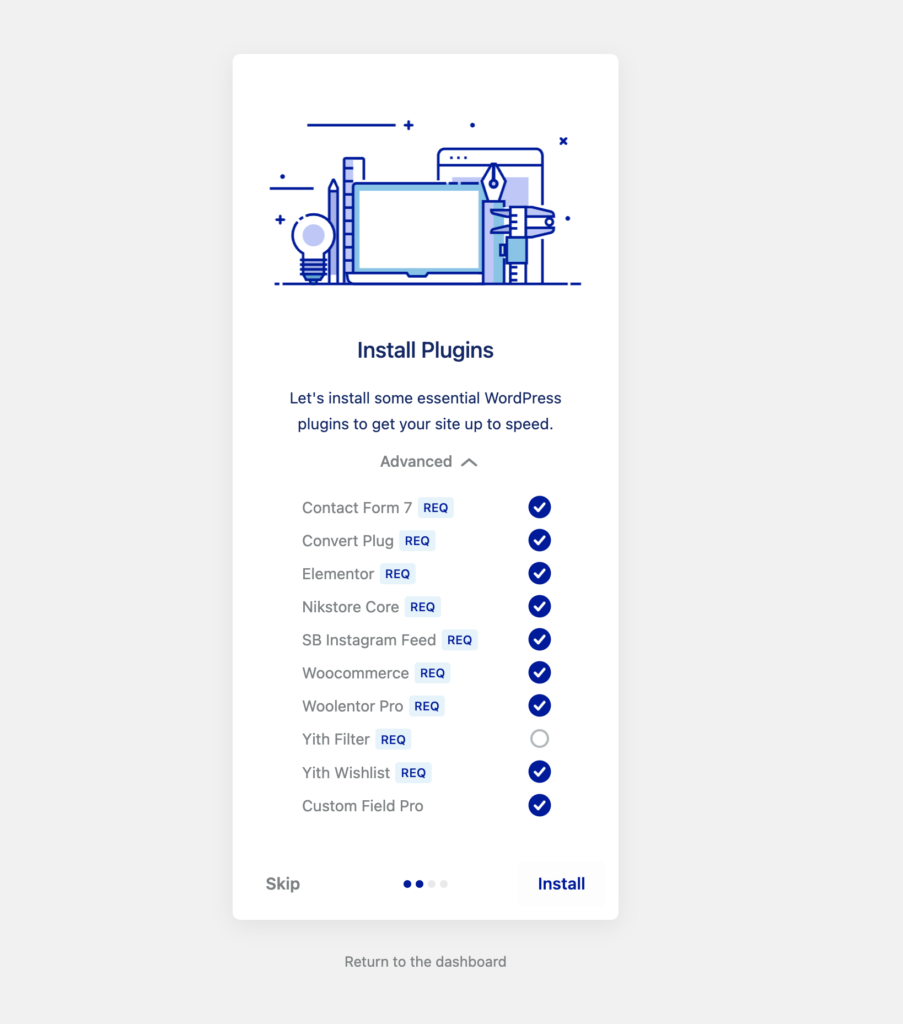
The Elementor WordPress Website Builder, a drag and drop page builder with integrated responsive features, is included with Woodly.

As you can see, Woodly’s elements were specifically created for the theme’s preferences and they flawlessly utilize the composer’s incredible visual interface. This means that Woodly does not have a single copy of Elementor with all of its components. You can use more than 50 custom widgets if you install the Woodly Elementor Extension by Euthemians.
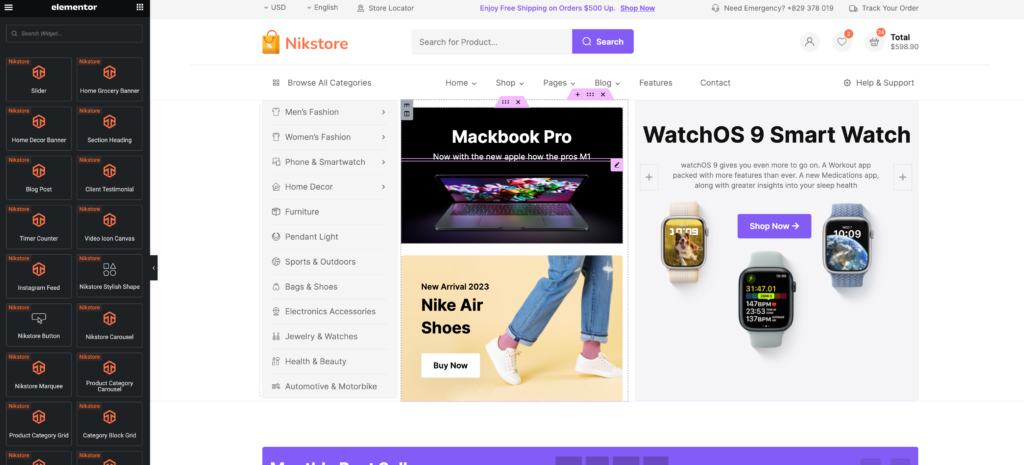
Slider
This element is not just a simple slider. Upload your images, select the navigation type and color. Set if you want autoplay, the slideshow speed, the image crop/resize! Don’t forget to set it to full-width element, it’s great!

Section Heading
This element will create a title that you can use to introduce a new section. You can set the size, alignment, font options, animation and the line-style(if you use a line).

Blog Post
This element will help to show blog post in any page with our designed different styles. You can set font size, alignment, color etc.

Client Testimonial
This element will create a title that you can use to introduce a new section. You can set the size, alignment, font options, animation and the line-style(if you use a line).

Time Counter
This element will create a title that you can use to introduce a new section. You can set the size, alignment, font options, animation and the line-style(if you use a line).

Video Icon Canvas
This element will create a title that you can use to introduce a new section. You can set the size, alignment, font options, animation and the line-style(if you use a line).

Woodly Stylish Shape
This element will create a title that you can use to introduce a new section. You can set the size, alignment, font options, animation and the line-style(if you use a line).

Woodly Button
This element will create a title that you can use to introduce a new section. You can set the size, alignment, font options, animation and the line-style(if you use a line).

Woodly Carousel
This element will create a title that you can use to introduce a new section. You can set the size, alignment, font options, animation and the line-style(if you use a line).

Woodly Marquee
This element will create a title that you can use to introduce a new section. You can set the size, alignment, font options, animation and the line-style(if you use a line).

Category Carousel
This element will create a title that you can use to introduce a new section. You can set the size, alignment, font options, animation and the line-style(if you use a line).

Category Grid
This element will create a title that you can use to introduce a new section. You can set the size, alignment, font options, animation and the line-style(if you use a line).

WooCommerce Products
This element will create a title that you can use to introduce a new section. You can set the size, alignment, font options, animation and the line-style(if you use a line).

WooCommerce list style Products
This element will create a title that you can use to introduce a new section. You can set the size, alignment, font options, animation and the line-style(if you use a line).

Product carousel
This element will create a title that you can use to introduce a new section. You can set the size, alignment, font options, animation and the line-style(if you use a line).

Uneven Product Grid
This element will create a title that you can use to introduce a new section. You can set the size, alignment, font options, animation and the line-style(if you use a line).

WooCommerce Filter Product
This element will create a title that you can use to introduce a new section. You can set the size, alignment, font options, animation and the line-style(if you use a line).

Vendor carousel
This element will create a title that you can use to introduce a new section. You can set the size, alignment, font options, animation and the line-style(if you use a line).

Offer Banner
This element will create a title that you can use to introduce a new section. You can set the size, alignment, font options, animation and the line-style(if you use a line).

Woodly Card Slides
This element will create a title that you can use to introduce a new section. You can set the size, alignment, font options, animation and the line-style(if you use a line).

The Crete theme works flawlessly with the most recent WooCommerce plugin. For this plugin, we altered and added numerous features, shortcodes, and widgets. You will learn how to install and configure the WooCommerce plugin in the sections that follow. For further details, you may also consult the WooCommerce documentation.

Create Order Tracking Page

To create Order Tracking page, please go Pages > Add New to create a new page. You can name this page as “Order Tracking” or anything else you want. Inside that page content, please insert this shortcode: [woocommerce_order_tracking]

After created the Order Tracking page, please go to WooCommerce > Settings then select Checkout tab. You will see an option for selecting what page is Order Tracking page.

Wishlist

Nestbyte Wishlist come with plugin “Yith Wishlist”. After install plugin you will able to configure it. If you want to load Wishlist shortcodes and widgets that may be cached, you must enable the Enable AJAX loading option available in the plugin General settings.
For more information you can follow their Documentation.

Compare

Nestbyte Compare coming with plugin “WPC Smart Compare”. After install plugin you will able to configure it. For more information read this documentation.

Setting Up WooCommerce

To set up WooCommerce, you go to WooCommerce > Settings in admin panel.
Currency Options
In WooCommerce Settings page, you select the General tab
You find the Currency Options section and configure your currency
List of currencies that you can choose

You can also add a custom currency symbol. Please refer this article.

Page Setting
After you create WooCommerce pages. You will go to the Settings page to assign them.

To assign the Shop page, you select the Products tab
To assign the My Account, Cart and Checkout pages, you select the Advanced tab

Registration Options
You also make sure that you allow your customers to register on your site. You select the Accounts & Privacy tab and find the Account creation section as the screenshot.

Product Image Sizes
You go to Appearance > Customize > WooCommerce > Product Images. You configure your product image size in there
Our default demo is configured as the screenshot

Adding Product

Follow the steps below to add a new product

In admin panel, you go to Products and click the Add New button
Input the product title and product content
Select Product Category, Product Tag
Add Featured Image and Product Gallery
In the Product Options section, you can override some options in Theme Options
Next is the Product Data section. This is where the majority of the product data is configured

Product Data
You should also read WooCommerce Documentation to get more details. We only have some notes that we think you need to know.

To manage widgets, you go to Appearance > Widgets. Just drag and drop widgets over to the sidebar.

Crete comes with 10 custom widgets and 4 sidebars. You can also easily add the custom sidebars.

Adding A New Sidebar

      Go to Woodly> Woodly options > extras > custom sidebar
      Add custom sidebar by clicking it. set sidebar name and description.

Crete is ready to translate by using the po file. If you want to build a multilingual site, you need to use the WPML plugin. Our theme does not include the WPML plugin. It is only compatible with the WPML plugin. Also you can use Loco Translate Plugin too.

Using Po File

There are 2 ways to create and edit the po file